


Azure App サービスでAPI のIFTTT フローをトリガー

Azure Logic Apps は ノーコードでアプリを構築できるクラウドサービスです。CData API Server と連携することで、ノーコードアプリ開発用のAPI のデータへのクラウドベースのアクセスをノーコードで追加できます。本記事では、API Server 経由でAzure Logic Apps からAPI 連携を実現する方法を紹介します。
API Server の設定
以下のリンクからAPI Server の無償トライアルをスタートしたら、セキュアなAPI OData サービスを作成していきましょう。
API への接続
Azure Logic Apps からAPI のデータを操作するには、まずyour API への接続を作成・設定します。
- API Server にログインして、「Connections」をクリック、さらに「接続を追加」をクリックします。
- 「接続を追加」をクリックして、データソースがAPI Server に事前にインストールされている場合は、一覧から「API」を選択します。
- 事前にインストールされていない場合は、コネクタを追加していきます。コネクタ追加の手順は以下の記事にまとめてありますので、ご確認ください。
CData コネクタの追加方法はこちら >> - それでは、API への接続設定を行っていきましょう!
-
To connect to your API, configure the following properties on the Global Settings page:
- In Authentication, select the Type and fill in the required properties
- In Headers, add the required HTTP headers for your API
- In Pagination, select the Type and fill in the required properties
After the configuring the global settings, navigate to the Tables to add tables. For each table you wish to add:
- Click "+ Add"
- Set the Name for the table
- Set Request URL to the API endpoint you wish to work with
")
- (Optional) In Parameters, add the required URL Parameters for your API endpoint
- (Optional) In Headers, add the required HTTP headers for the API endpoint
- In Table Data click " Configure"
- Review the response from the API and click "Next"
")
- Select which element to use as the Repeated Elements and which elements to use as Columns and click "Next"
")
- Preview the tabular model of the API response and click "Confirm"
")
- 接続情報の入力が完了したら、「保存およびテスト」をクリックします。
To connect to your API, configure the following properties on the Global Settings page:
- In Authentication, select the Type and fill in the required properties
- In Headers, add the required HTTP headers for your API
- In Pagination, select the Type and fill in the required properties
After the configuring the global settings, navigate to the Tables to add tables. For each table you wish to add:
- Click "+ Add"
- Set the Name for the table
- Set Request URL to the API endpoint you wish to work with
- (Optional) In Parameters, add the required URL Parameters for your API endpoint
- (Optional) In Headers, add the required HTTP headers for the API endpoint
- In Table Data click " Configure"
- Review the response from the API and click "Next"
- Select which element to use as the Repeated Elements and which elements to use as Columns and click "Next"
- Preview the tabular model of the API response and click "Confirm"
API Server のユーザー設定
次に、API Server 経由でAPI にアクセスするユーザーを作成します。「Users」ページでユーザーを追加・設定できます。やってみましょう。
- 「Users」ページで ユーザーを追加をクリックすると、「ユーザーを追加」ポップアップが開きます。
-
次に、「ロール」、「ユーザー名」、「権限」プロパティを設定し、「ユーザーを追加」をクリックします。

-
その後、ユーザーの認証トークンが生成されます。各ユーザーの認証トークンとその他の情報は「Users」ページで確認できます。

API 用のAPI エンドポイントの作成
ユーザーを作成したら、API のデータ用のAPI エンドポイントを作成していきます。
-
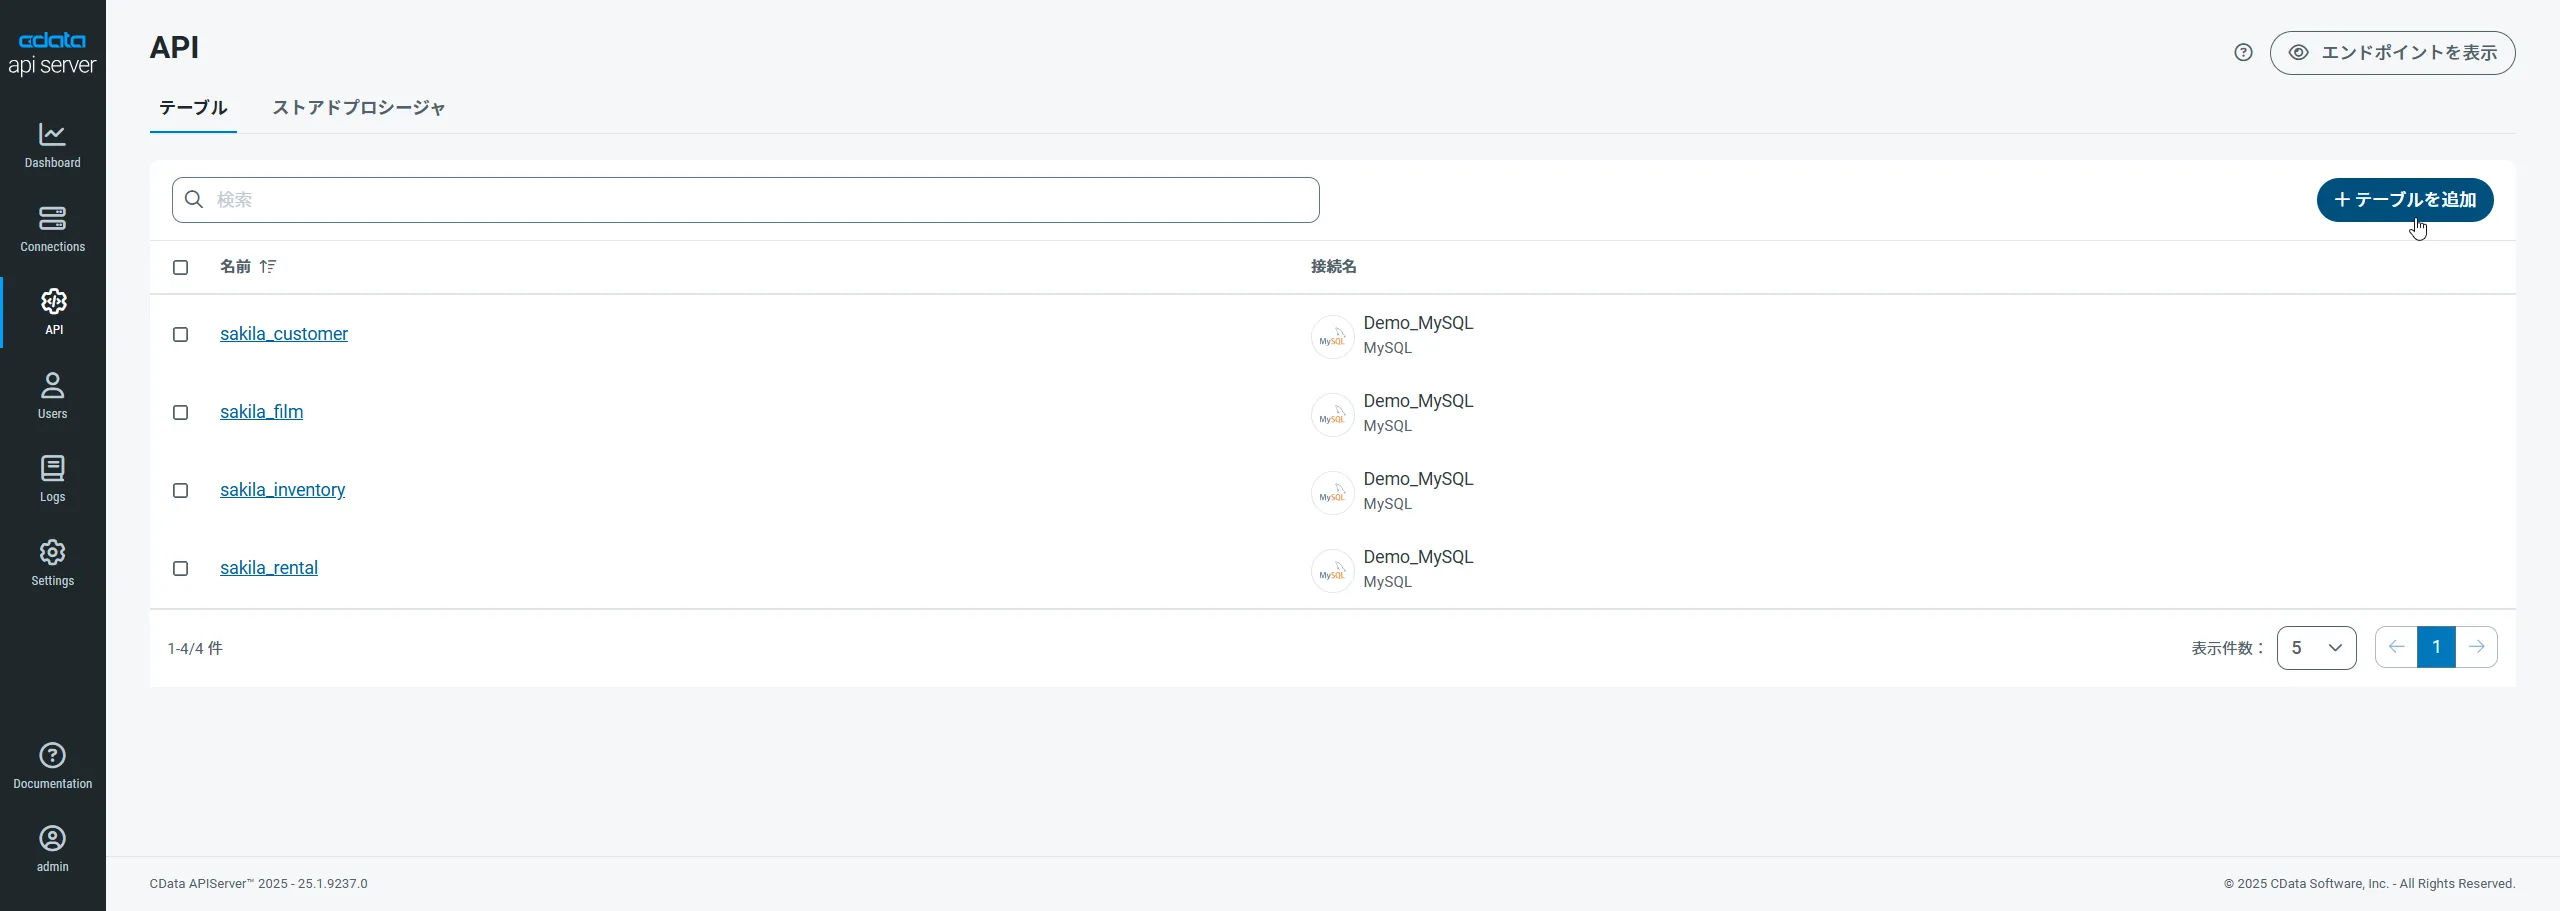
まず、「API」ページに移動し、
「 テーブルを追加」をクリックします。
-
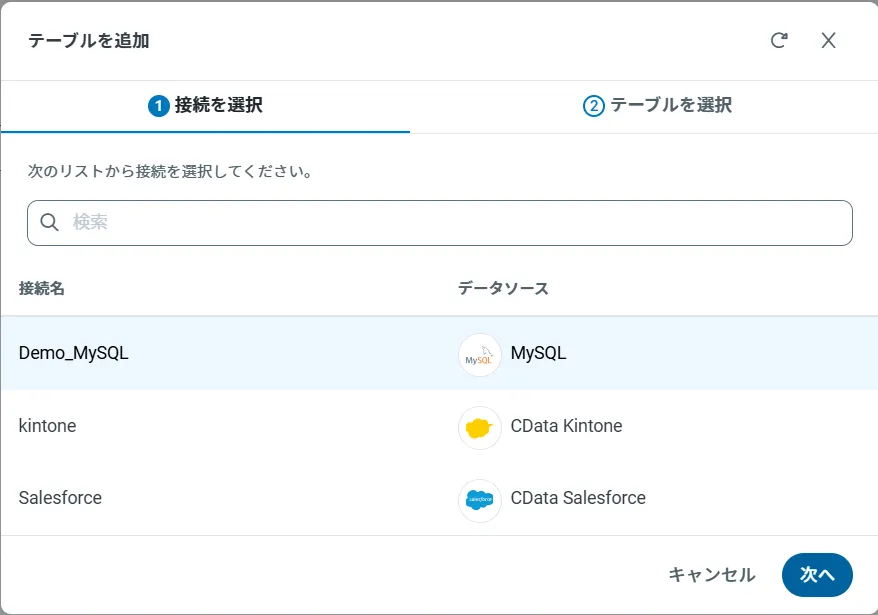
アクセスしたい接続を選択し、次へをクリックします。
-
接続を選択した状態で、各テーブルを選択して確認をクリックすることでエンドポイントを作成します。

OData のエンドポイントを取得
以上でAPI への接続を設定してユーザーを作成し、API Server でAPI データのAPI を追加しました。これで、OData 形式のAPI データをREST API で利用できます。API Server の「API」ページから、API のエンドポイントを表示およびコピーできます。

コネクションとOData エンドポイントを設定したら、Azure Logic Apps からAPI のデータに接続できます。
Logic App でAPI にアクセス
Logic App でAPI Server を使用し、API の周りにプロセスフローを作成できます。HTTP + Swagger アクションは、API に対して実行する操作を定義するためのウィザードを提供します。以下のステップでは、Logic App でAPI を取得する方法を説明しています。
テーブルにレコードの作成日を含むカラムがある場合は、以下のステップに従って新しいレコードのカラム値をチェックする関数を作成できます。それ以外の場合は、[Create a Logic App]セクションにスキップし、フィルタに一致するエンティティにメールを送信します。
新しいAPI エンティティを確認
特定の新しいAPI エンティティを見つけるために、インターバルの開始日時の値を取得する関数を作成できます。
- [Azure Portal]で、[New]->[Function App]->[Create]と進みます。
- 名前を入力し、サブスクリプション、リソースグループ、App Service プラン、そしてストレージアカウントを選択します。
- Function App を選択し、Webhook + API シナリオを選択します。
- 言語を選択します。この記事では、JavaScript を使用します。
- 以下のコードを追加し、JSON オブジェクトで前の時間を返します。
module.exports = function (context, data) {
  var d = new Date();
  d.setHours(d.getHours()-1);
  // Response of the function to be used later.
  context.res = {
    body: {
      start: d
    }
  };
  context.done();
};
トリガーにAPI を追加
以下のステップに従って、フィルタに一致する結果をAPI で検索するトリガーを作成します。上記の関数を作成した場合は、返されたインターバルの開始後に作成されたオブジェクトを検索できます。
- Azure Portal で[New]をクリックし、[Web + Mobile]セクションで[Logic App]を選択してリソースグループとApp Service プランを選択します。
- これで、Logic App Designer で使用可能なウィザードが使用できます。このウィザードには、Logic App の設定ブレードからアクセスできます。Blank Logic App templateを選択します。
- API オブジェクトをポーリングするRecurrence アクションを追加します。この記事では、一時間ごとにポーリングします。タイムゾーンを選択します。デフォルトはUTC です。
- 関数アクションを追加します。[Add Action]ダイアログのメニューを展開し、リジョンにAzure 関数を表示するオプションを選択します。先に作成したFunction App を選択し、インターバル開始を返す関数を選択します。
- からの中括弧のペア({})を入力し、からのペイロードオブジェクトを関数に渡します。
- HTTP + Swagger アクションを追加し、API Server のOData エンドポイントを入力します。
http://MySite:MyPort/api.rsc/@MyAuthtoken/$oas
- [Return posts]操作を選択します。
各プロパティの説明を使用して、取得する列やフィルターなどの追加パラメータを指定します。以下はフィルタの一例です。
userId eq '12345'
getInterval 関数から返された日時値を使用するには、posts テーブルの日時列で[ge]演算子を使用し、ダイアログでBody パラメータを選択します。日時値を囲むには、クォーテーションを使用する必要があることに注意して下さい。
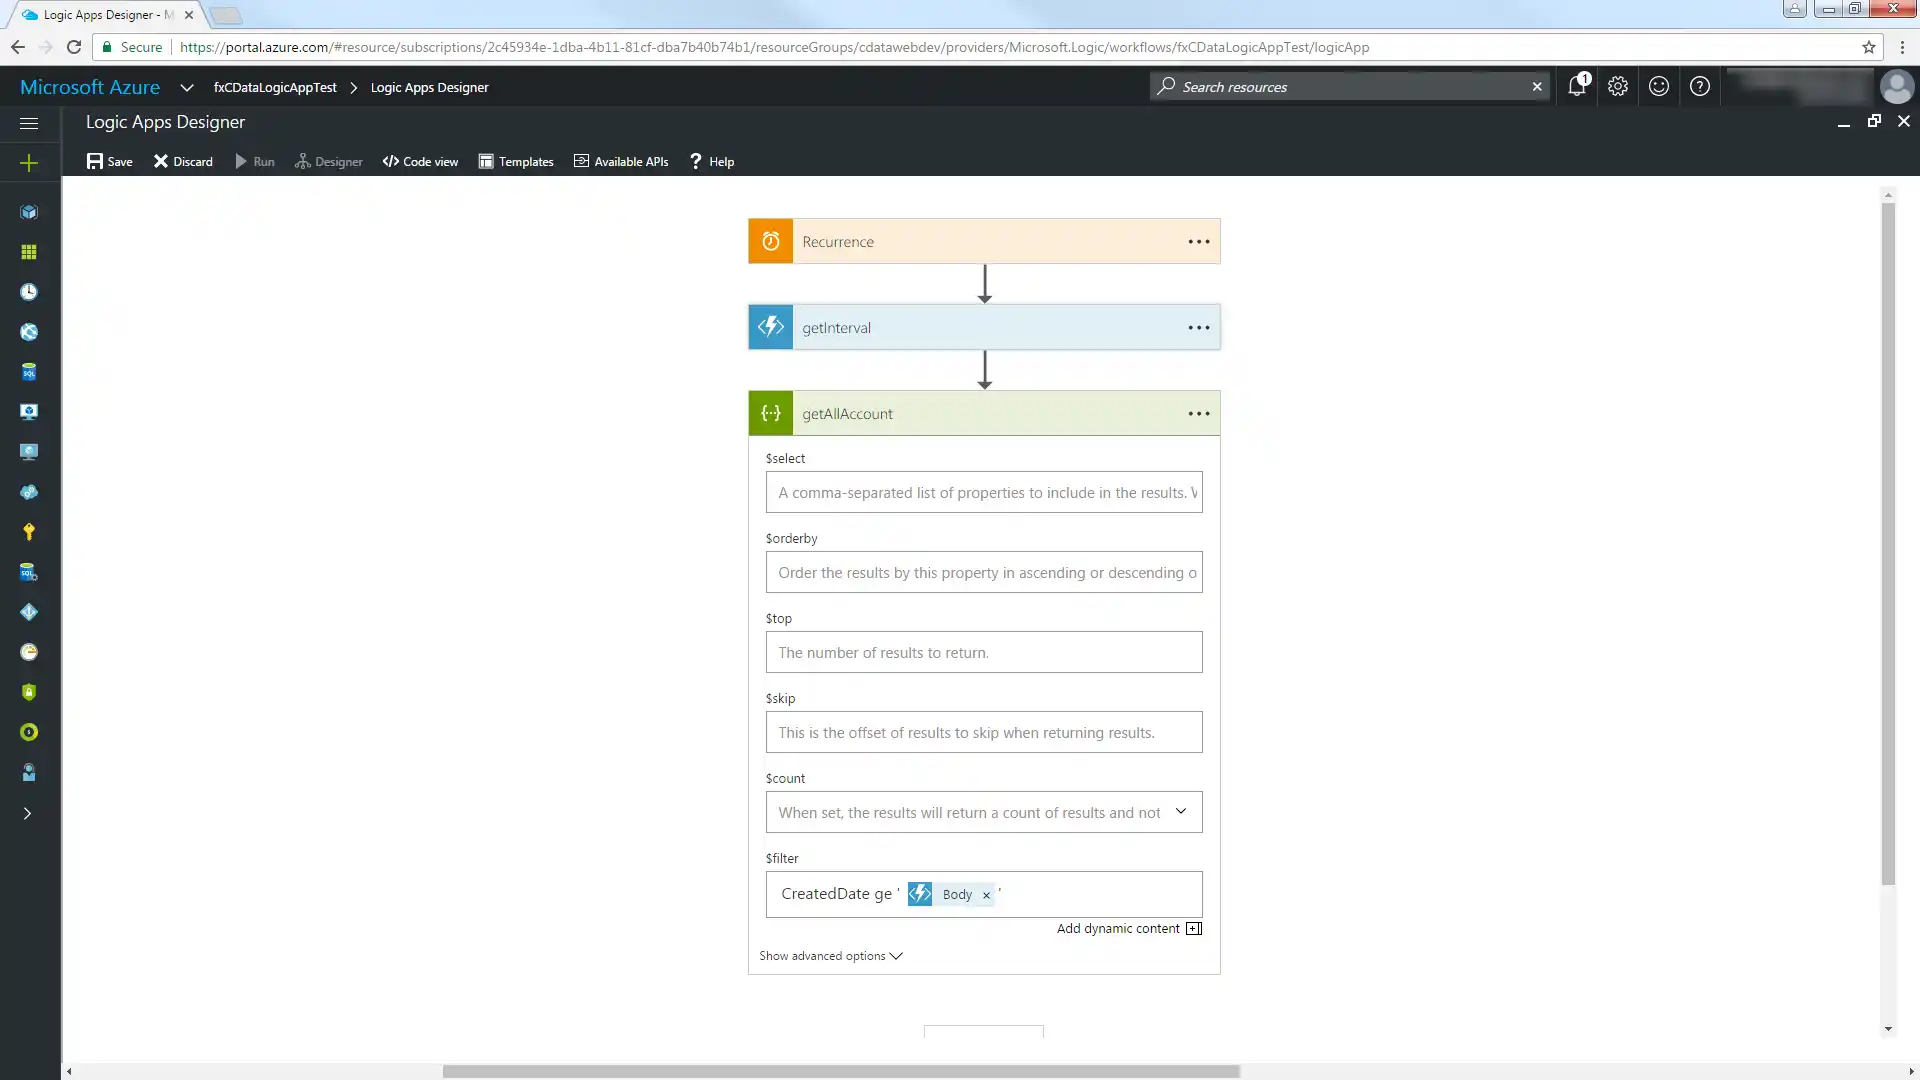
[Code View]に切り替え、$filter 式を変更してインターバルの開始を含むプロパティを抽出します。'@{body('MyFunc')['MyProp']' 構文を使用します。
"getAllAccount": {
  "inputs": {
    "method": "get",
      "queries": {
        "$filter":"CreatedDate ge '@{body('getInterval')['start']}'"
      },
      "uri": "https://MySite:MyPort/api.rsc/@MyAuthtoken/posts"
  }
これで、ワークフローのデータソースおよび宛先としてAPI にアクセスできます。
新しレコードをメールで送信
以下のステップに従って、新しいposts エンティティを含むレポートをメールで送信します。
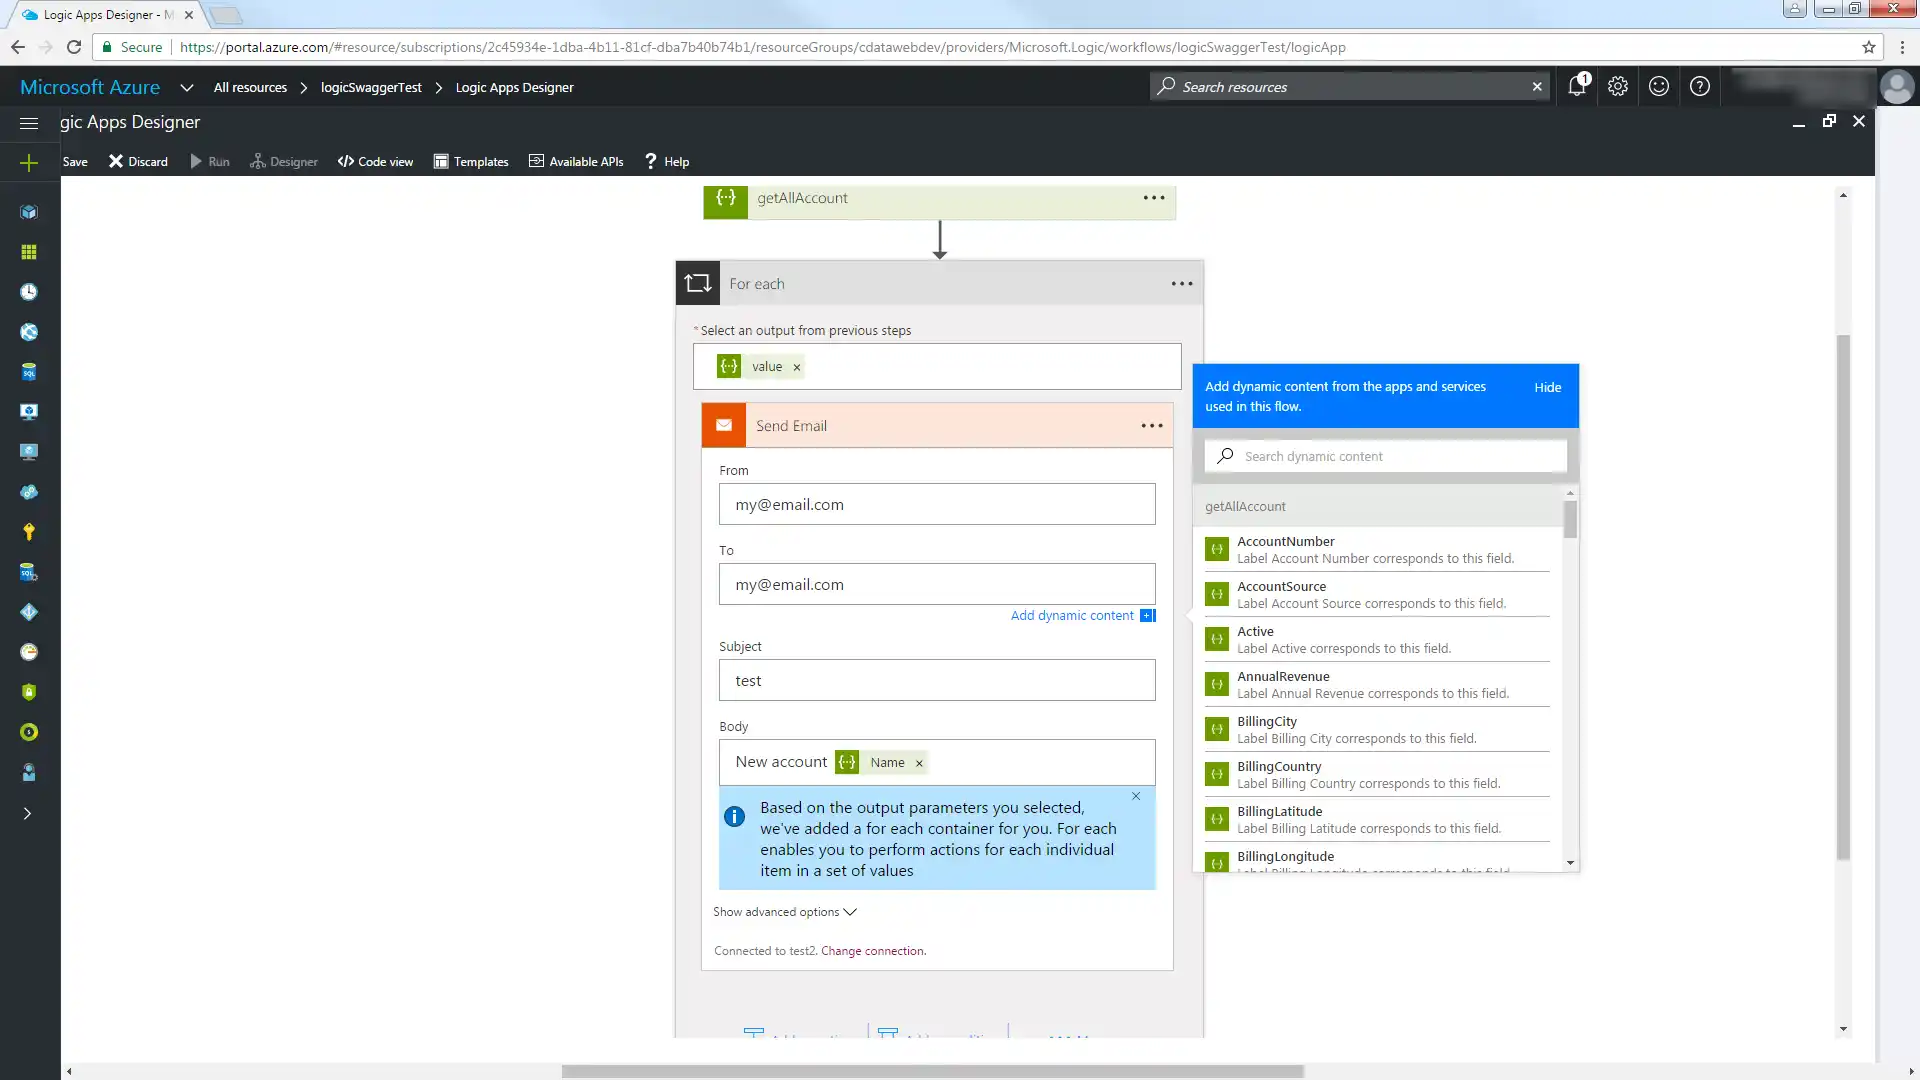
- [Logic Apps Designer]で[SMTP - Send Email]アクションを追加します。
- SMTP サーバーに必要な情報を構成します。
- From、To、Subject、Body を構成します。返されたAPI 列からパラメータを追加できます。
[Save]をクリックし、[Run]をクリックして過去一時間に作成されたAPI レコードに関する電子メール通知を送信します。
クラウドアプリケーションからAPI のデータへのライブ接続
Azure Logic Apps からAPI のリアルタイムデータに直接接続できるようになりました。これで、API のデータを複製せずにより多くの接続とアプリを作成できます。
クラウドアプリケーションから直接100を超えるSaaS 、ビッグデータ、NoSQL ソースへのリアルタイムデータアクセスを取得するには、API Server を参照してください。