


Bubble で使えるAPI のデータ連携用のバックエンドAPI をノーコードで開発

CData API Server を使って、Bubble から API に接続してデータを取得する方法を説明します。
API Server の設定
以下のリンクからAPI Server の無償トライアルをスタートしたら、セキュアなAPI OData サービスを作成していきましょう。
API への接続
Bubble からAPI のデータを操作するには、まずyour API への接続を作成・設定します。
- API Server にログインして、「Connections」をクリック、さらに「接続を追加」をクリックします。
- 「接続を追加」をクリックして、データソースがAPI Server に事前にインストールされている場合は、一覧から「API」を選択します。
- 事前にインストールされていない場合は、コネクタを追加していきます。コネクタ追加の手順は以下の記事にまとめてありますので、ご確認ください。
CData コネクタの追加方法はこちら >> - それでは、API への接続設定を行っていきましょう!
-
To connect to your API, configure the following properties on the Global Settings page:
- In Authentication, select the Type and fill in the required properties
- In Headers, add the required HTTP headers for your API
- In Pagination, select the Type and fill in the required properties
After the configuring the global settings, navigate to the Tables to add tables. For each table you wish to add:
- Click "+ Add"
- Set the Name for the table
- Set Request URL to the API endpoint you wish to work with
")
- (Optional) In Parameters, add the required URL Parameters for your API endpoint
- (Optional) In Headers, add the required HTTP headers for the API endpoint
- In Table Data click " Configure"
- Review the response from the API and click "Next"
")
- Select which element to use as the Repeated Elements and which elements to use as Columns and click "Next"
")
- Preview the tabular model of the API response and click "Confirm"
")
- 接続情報の入力が完了したら、「保存およびテスト」をクリックします。
To connect to your API, configure the following properties on the Global Settings page:
- In Authentication, select the Type and fill in the required properties
- In Headers, add the required HTTP headers for your API
- In Pagination, select the Type and fill in the required properties
After the configuring the global settings, navigate to the Tables to add tables. For each table you wish to add:
- Click "+ Add"
- Set the Name for the table
- Set Request URL to the API endpoint you wish to work with
- (Optional) In Parameters, add the required URL Parameters for your API endpoint
- (Optional) In Headers, add the required HTTP headers for the API endpoint
- In Table Data click " Configure"
- Review the response from the API and click "Next"
- Select which element to use as the Repeated Elements and which elements to use as Columns and click "Next"
- Preview the tabular model of the API response and click "Confirm"
API Server のユーザー設定
次に、API Server 経由でAPI にアクセスするユーザーを作成します。「Users」ページでユーザーを追加・設定できます。やってみましょう。
- 「Users」ページで ユーザーを追加をクリックすると、「ユーザーを追加」ポップアップが開きます。
-
次に、「ロール」、「ユーザー名」、「権限」プロパティを設定し、「ユーザーを追加」をクリックします。

-
その後、ユーザーの認証トークンが生成されます。各ユーザーの認証トークンとその他の情報は「Users」ページで確認できます。

API 用のAPI エンドポイントの作成
ユーザーを作成したら、API のデータ用のAPI エンドポイントを作成していきます。
-
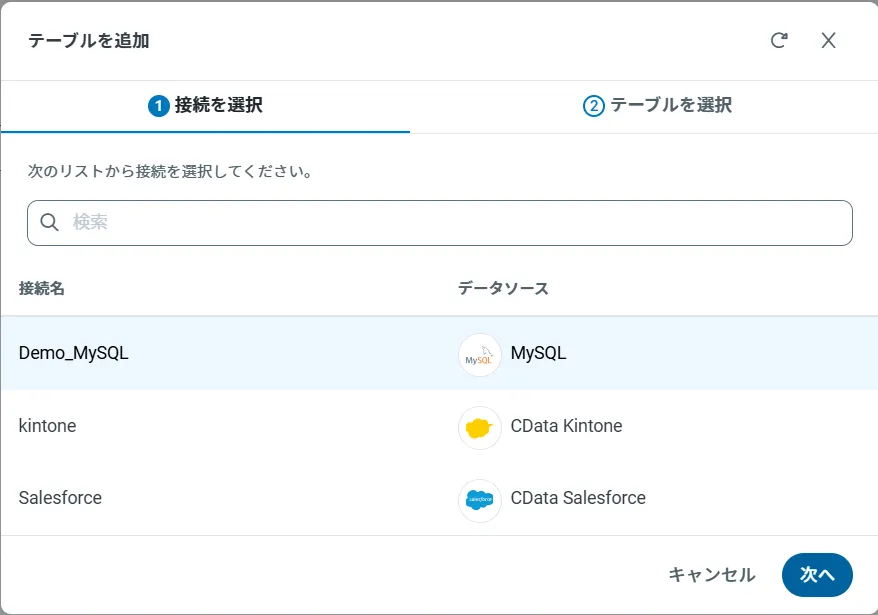
まず、「API」ページに移動し、
「 テーブルを追加」をクリックします。
-
アクセスしたい接続を選択し、次へをクリックします。
-
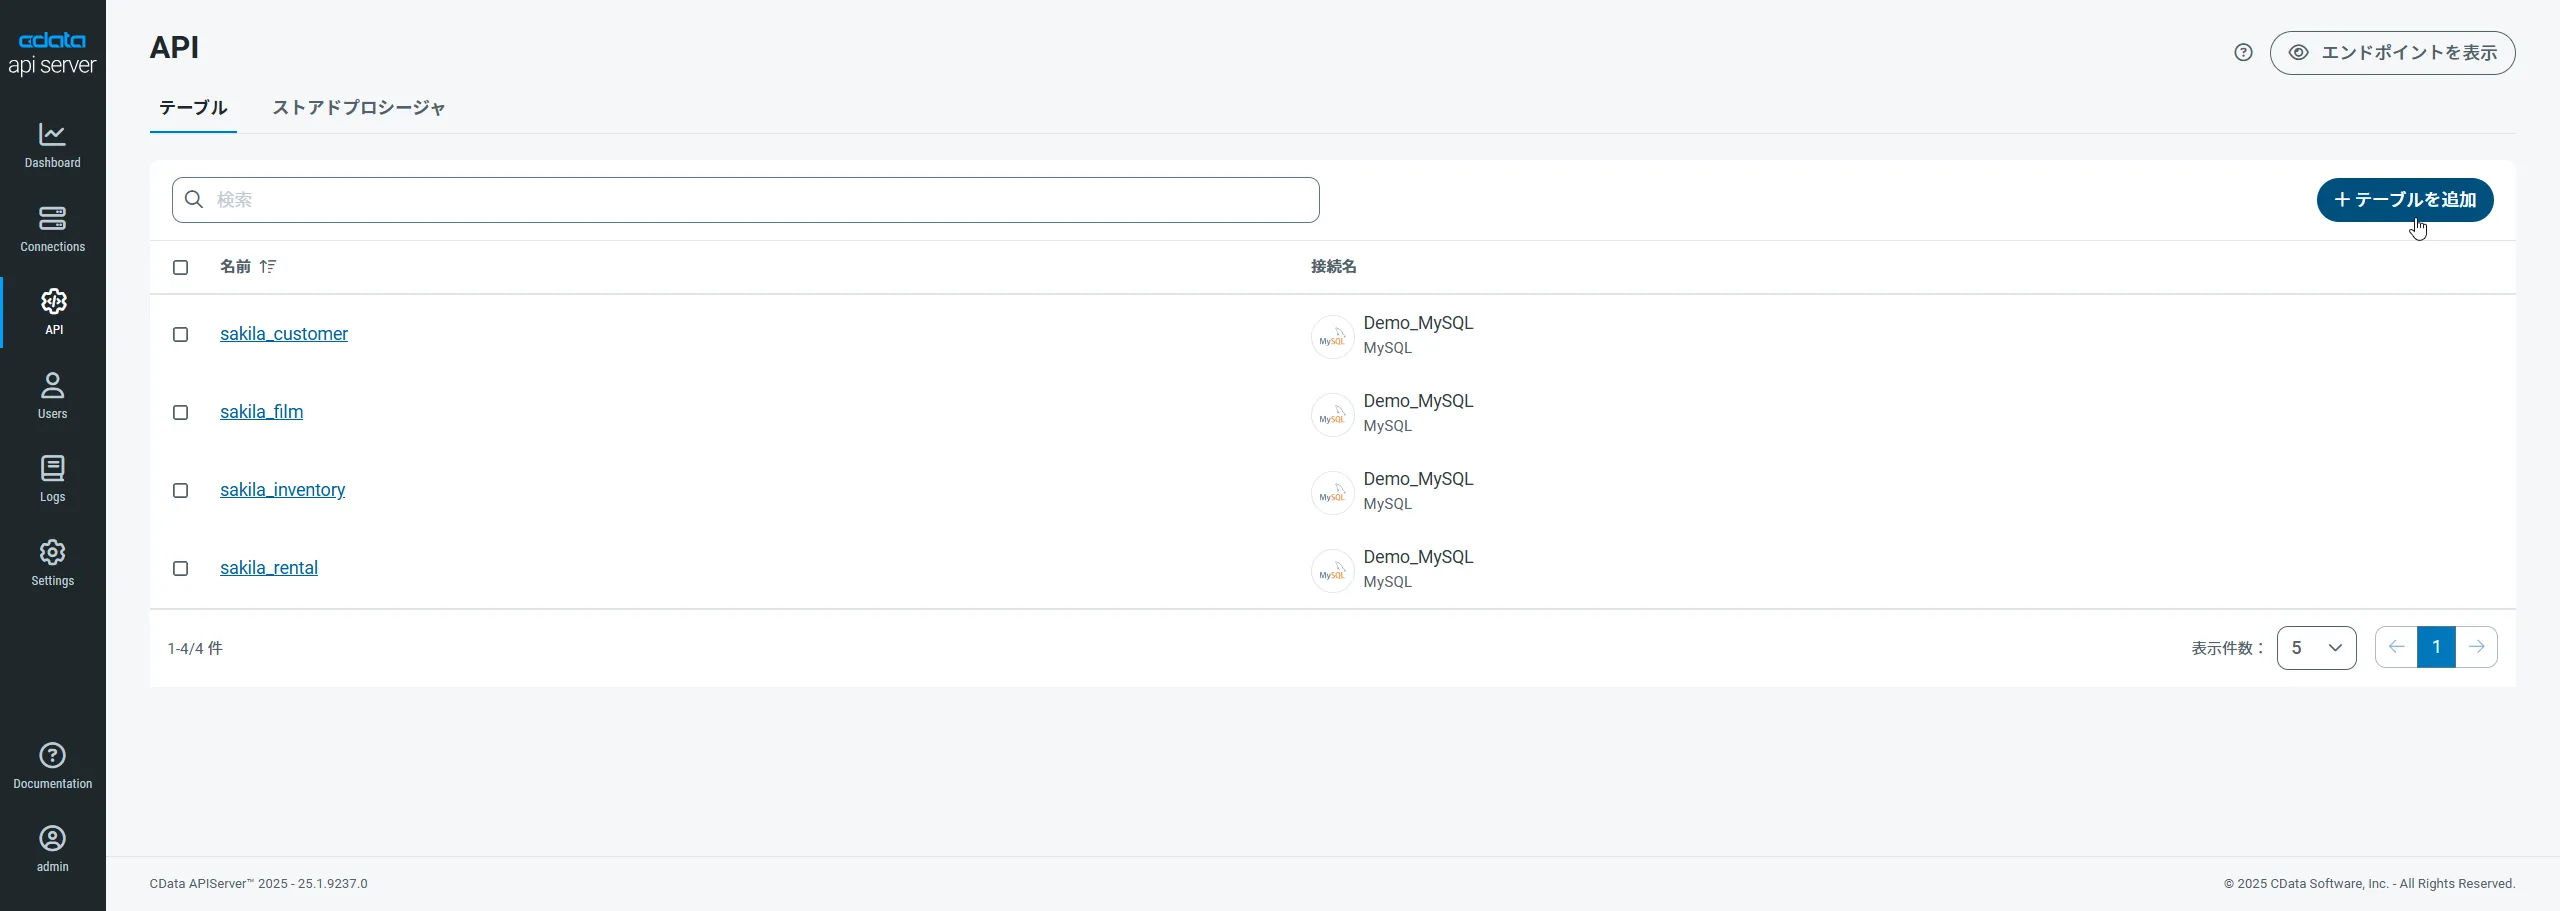
接続を選択した状態で、各テーブルを選択して確認をクリックすることでエンドポイントを作成します。

OData のエンドポイントを取得
以上でAPI への接続を設定してユーザーを作成し、API Server でAPI データのAPI を追加しました。これで、OData 形式のAPI データをREST API で利用できます。API Server の「API」ページから、API のエンドポイントを表示およびコピーできます。

オンプレミスDB やファイルからのAPI Server 使用(オプション)
オンプレミスRDB やExcel/CSV などのファイルのデータを使用する場合には、API Server のCloug Gateway / SSH ポートフォワーディングが便利です。是非、Cloud Gatway の設定方法 記事を参考にしてください。
API のデータに接続したアプリを作成
OData エンドポイントをAPI Server に追加したら、API のデータへのライブ接続が可能なアプリをBubble で作成できます。
Bubble API Connector を設定
まずは、Bubble からCData API Server にアクセスするためのAPI Connector を設定します。
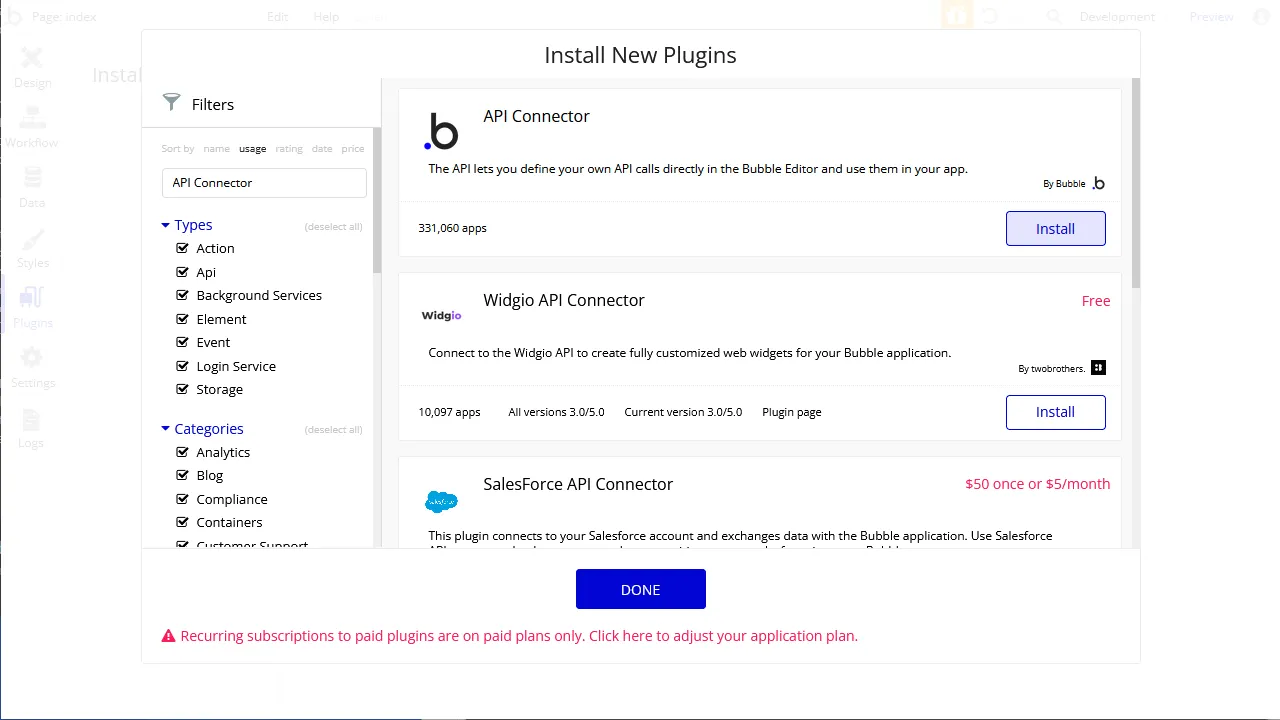
- アプリ内で、Plugins タブをクリックして Add plugins をクリックします。
- 「API Connector」を検索して「Install」をクリックします。
- インストール後、「Add another API」ボタンをクリックしてAPI を設定します。
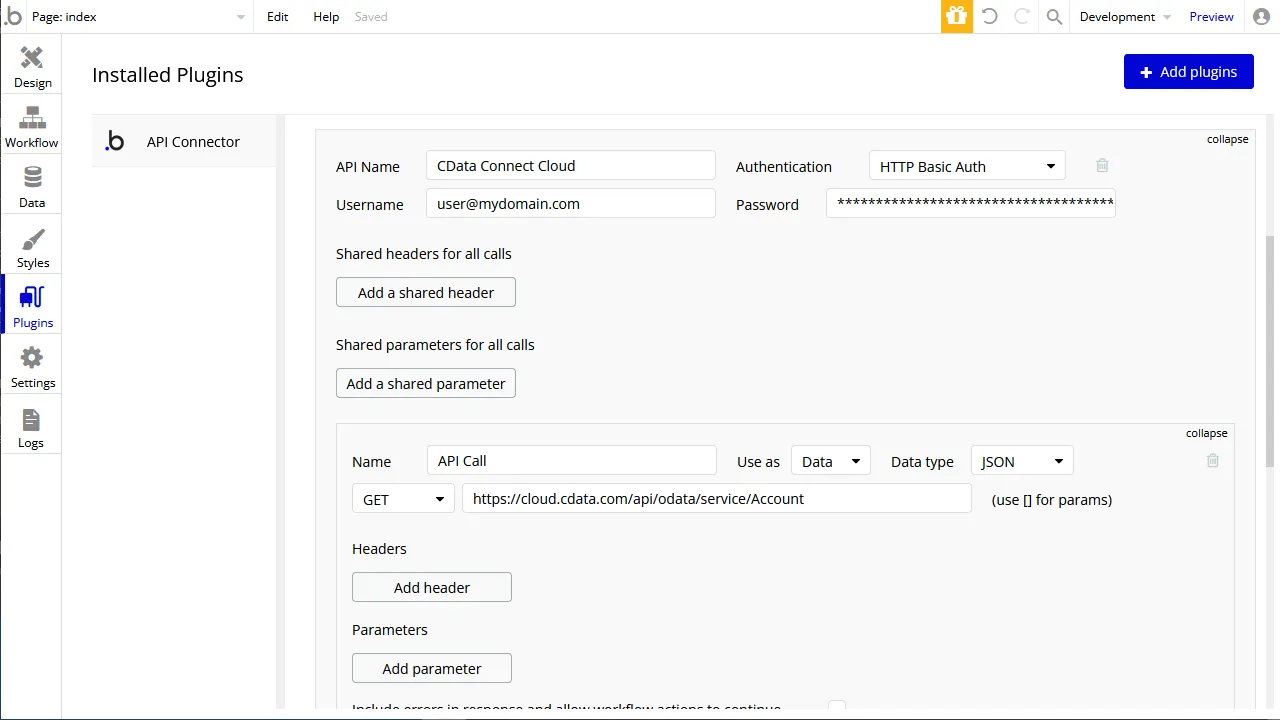
- API に名前を設定します。
- Authentication を「HTTP Basic Auth」に設定します。
- Username をAPI Server のユーザーに設定します([email protected])。
- Password を上記のユーザーのPAT に設定します。
- API Call を展開して、「GET」コマンドを選択してURL を先ほど設定したOData エンドポイントに設定します。
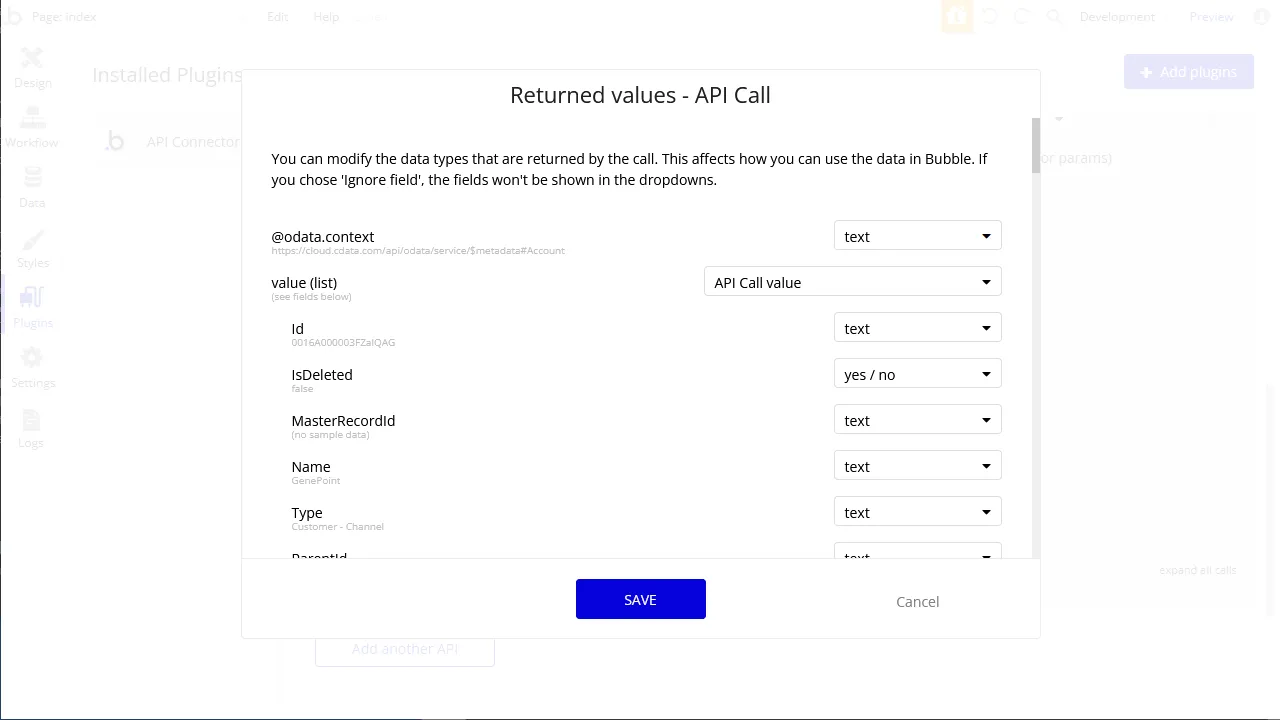
- 「Initialize call」ボタンをクリックしてレスポンスのデータ型を必要に応じて調整します。
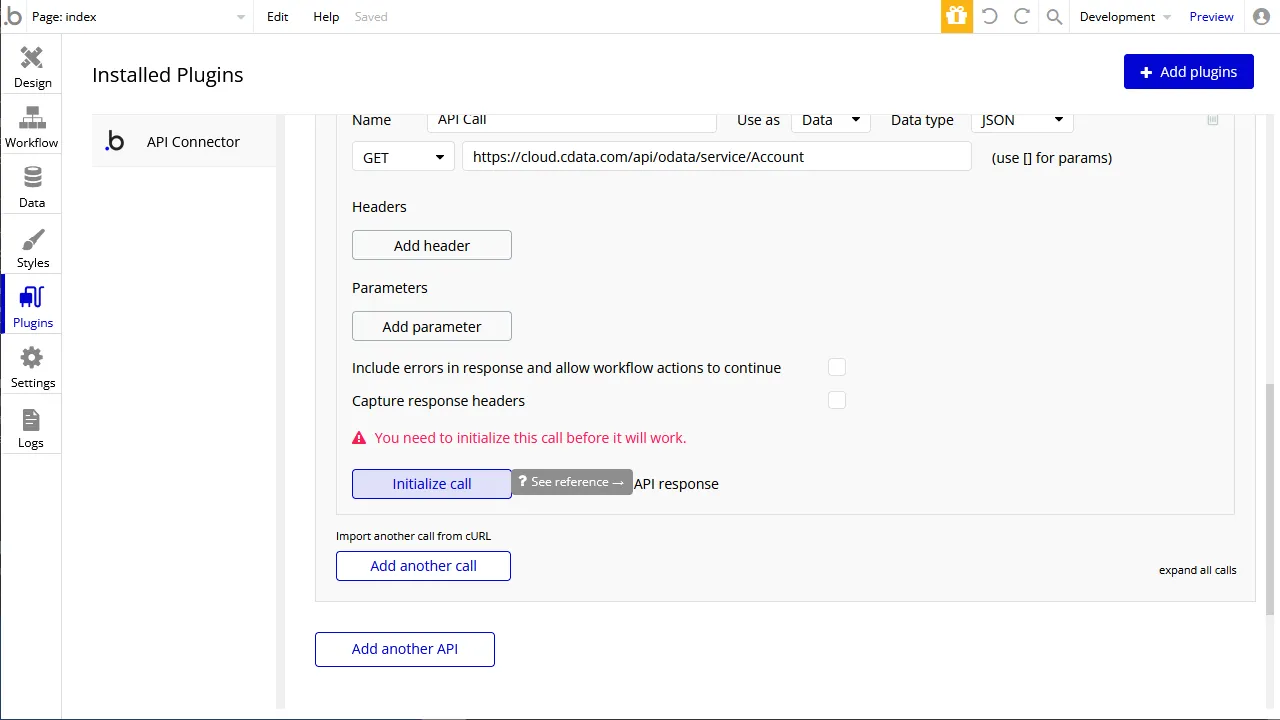
- 必要な変更を加えた後、「SAVE」をクリックします。
App UI の設定
API Connector を設定したら、Bubble アプリでAPI のデータを取得できます。本記事では、Excel ライクなテーブルを表示できるUI コンポーネントでデータをリクエストします。
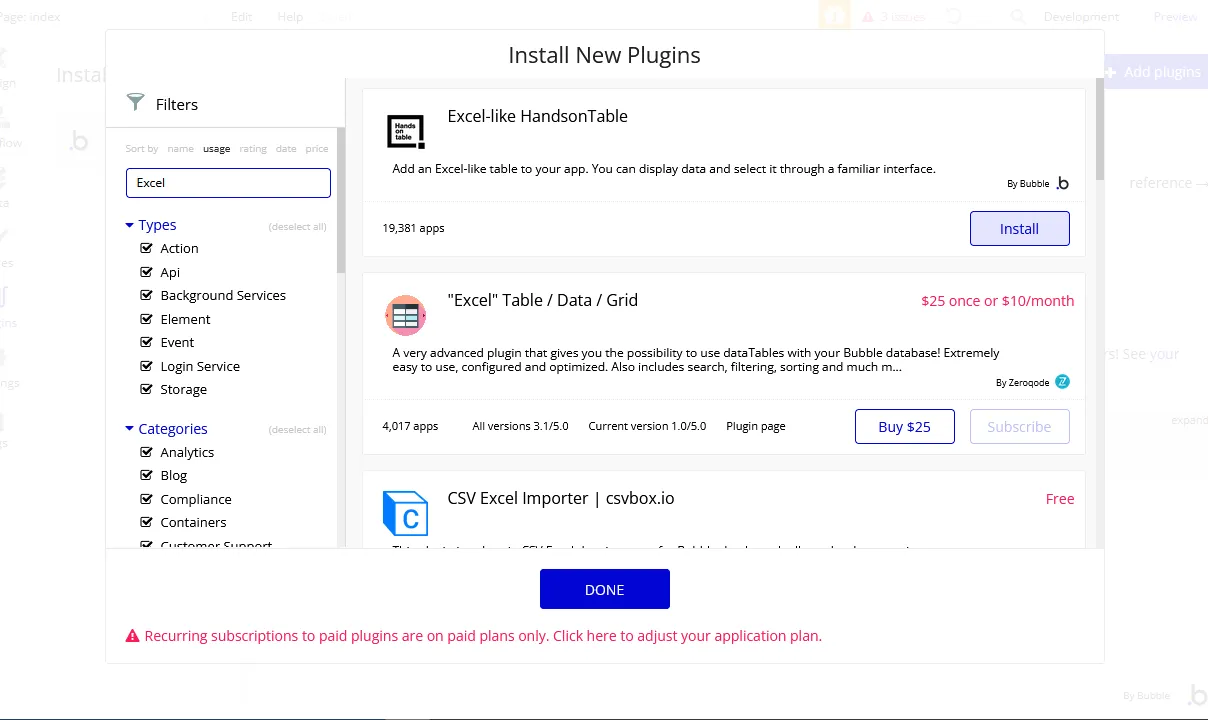
- Plugin タブで、「Excel-like HandsonTable」をインストールします。
- Design タブで、「Excel Table」をワークスペースに追加します。
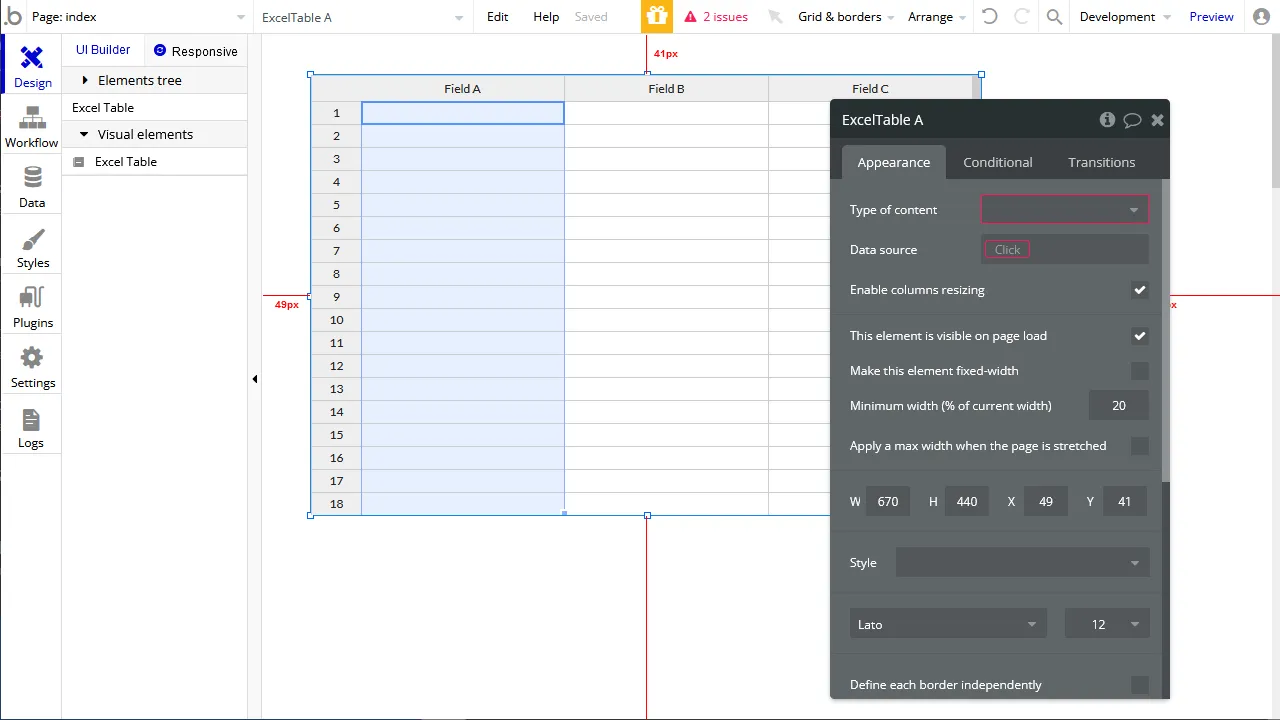
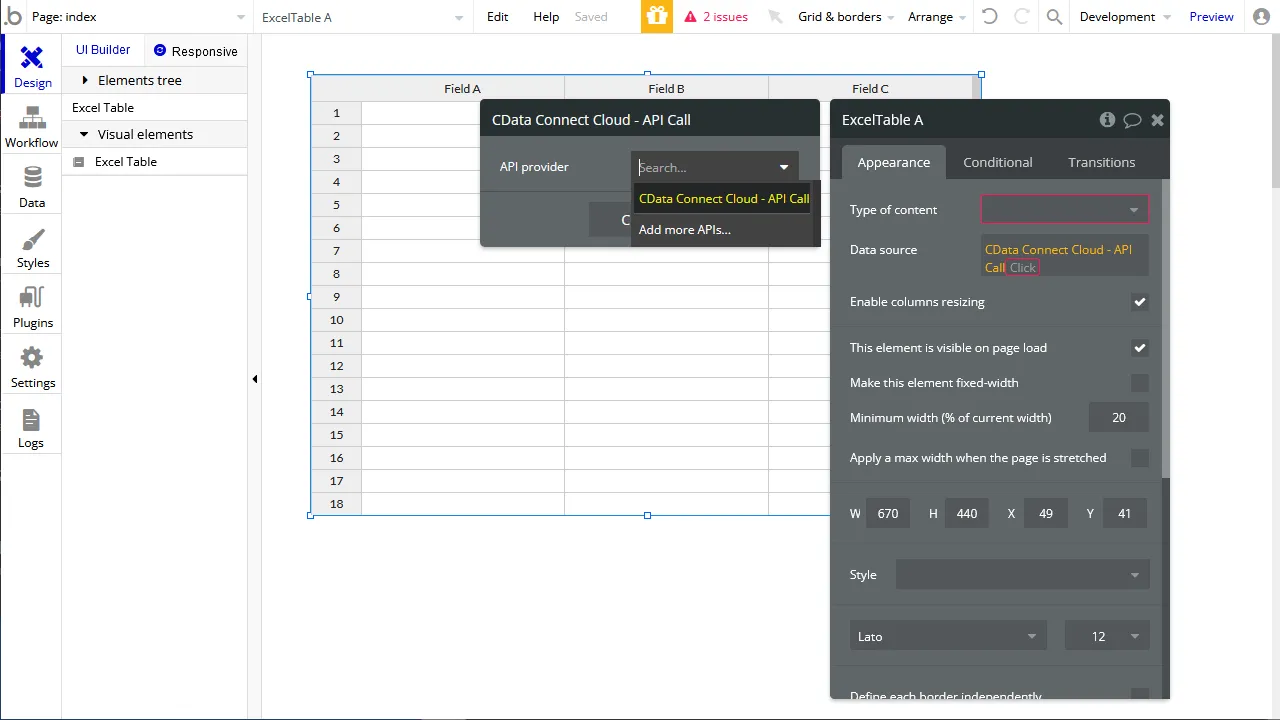
- Excel Table のData source で、「Get data from an external API」を選択します。
- Type of content を「API Call value」に設定します。
- Data source を"API Server - <API Call の値>"(またはこれと同等な値)に設定します。
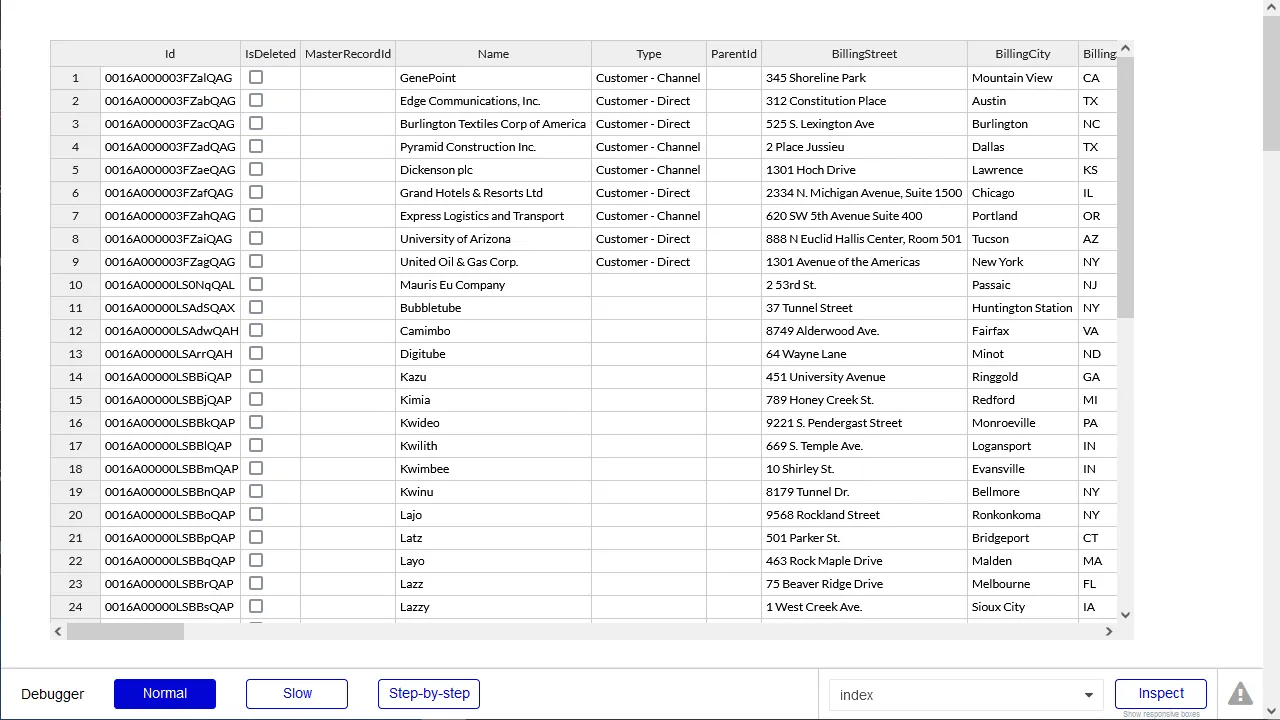
- 「Preview」をクリックしてAPI からデータが取得できたことを確認します。
この時点で、バックエンドAPI を設定する手間なくAPI のデータへのライブ接続を持つアプリケーションを開発できます。
クラウドアプリケーションからAPI のデータへのライブ接続
Bubble からAPI のリアルタイムデータに直接接続できるようになりました。これで、API のデータを複製せずにより多くの接続とアプリを作成できます。
まとめと30日の無償評価版のご案内
このように API 内のデータをBubble で利用することができるようになります。CData API Server は、30日の無償評価版があります。是非、お試しいただき、Bubble からのデータ参照を体感ください。