







TIBCO Data Virtualization で SAP Ariba Source のデータ にリアルタイムアクセスする方法
TIBCO Data Virtualization(TDV)は、複数の多様なデータソースへのアクセスを一元管理するエンタープライズデータ仮想化ソリューションです。CData TIBCO DV Adapter for SAP Ariba Source と組み合わせることで、TIBCO Data Virtualization 内からSAP Ariba Source のデータに直接フェデレーテッドアクセスが可能になります。この記事では、アダプターのデプロイと SAP Ariba Source に基づく新しいデータソースの作成手順を解説します。
CData TIBCO DV Adapter は、最適化されたデータ処理機能が組み込まれており、SAP Ariba Source のデータ とのインタラクションにおいて比類のないパフォーマンスを発揮します。SAP Ariba Source に対して複雑な SQL クエリを発行すると、アダプターはフィルタや集計などサポートされている SQL 操作を直接 SAP Ariba Source にプッシュします。組み込みの動的メタデータクエリにより、ネイティブのデータ型を使用してSAP Ariba Source のデータを操作・分析できます。
SAP Ariba Source TIBCO DV Adapter のデプロイ
コンソールで、TDV Server のインストールディレクトリ内の bin フォルダに移動します。現在のバージョンのアダプターがインストールされている場合は、先にアンデプロイする必要があります。
.\server_util.bat -server localhost -user admin -password ******** -undeploy -version 1 -name SAPAribaSource
CData TIBCO DV Adapter をローカルフォルダに解凍し、解凍した場所から JAR ファイル(tdv.saparibasource.jar)をサーバーにデプロイします。
.\server_util.bat -server localhost -user admin -password ******** -deploy -package /PATH/TO/tdv.saparibasource.jar
新しい JAR ファイルが正しくロードされるように、サーバーの再起動が必要な場合があります。再起動は、C:\Program Files\TIBCO\TDV Server <version>\bin にある composite.bat スクリプトを実行して行えます。サーバーを再起動した後は、TDV Studio への再認証が必要です。
再起動コマンドの例
.\composite.bat monitor restart
OAuth を使用して SAP Ariba Source で認証する
SAP Ariba Source は OAuth プロトコルを使用して認証を行いますが、TDV Studio は内部でブラウザベースの認証をサポートしていないため、OAuth トークンを取得するための簡単な Java アプリケーションを作成して実行する必要があります。取得したトークンは、アダプターから直接 SAP Ariba Source に接続するために使用されます。
Create the Java Application
- Create a new Java file with preferred name for example GenOAuthSettings.java. This Java file leverages the SAPAribaSourceOAuth class contained within the TDV Adapter JAR to initiate a test connection and perform the required OAuth authentication flow
- Copy and insert the following code into the .java file:
- Place the .java file in the same directory as the tdv.saparibasource.jar file. This is required to prevent classpath resolution errors during compilation and execution
public class GenOAuthSettings {
    public static void main(String[] args) {
        try {
    	    if (args.length != 2) {
    			throw new Exception("Input must have two arguments: 'data source', 'connection string'");
    		}

    		String source = args[0].replace(" ", "").toLowerCase();
    		String connectionString = args[1];
    		String prefix;

    		if (source.equals("saparibasource")) {
    			prefix = "jdbc:saparibasource:";

    			com.cdata.cis.saparibasource.SAPAribaSourceOAuth oauth = new com.cdata.cis.saparibasource.SAPAribaSourceOAuth();

    			if (!connectionString.startsWith(prefix)) connectionString = prefix + connectionString;
    			oauth.generateOAuthSettingsFile(connectionString);
    		}
    		// More sources can be added below using the same format.  You must add the import statement and ensure the jar file resides in the classpath
			//            else if (source.equals("googlebigquery") || source.equals("bigquery")) {
			//                prefix = "jdbc:googlebigquery:";
			//
			//                com.cdata.cis.googlebigquery.GoogleBigQueryOAuth oauth = new com.cdata.cis.googlebigquery.GoogleBigQueryOAuth();
			//
			//                if (!connectionString.startsWith(prefix)) connectionString = prefix + connectionString;
			//                oauth.generateOAuthSettingsFile(connectionString);
			//            }
    		else {
				throw new Exception("Data Source not supported.  Available Data Sources: SAP Ariba Source");
			}

			System.out.println("Test Connection Successful!");
		} catch (Exception e) {
			e.printStackTrace();
		}
	}
}
Build and run the Java Application
- Open Console and navigate to the directory containing the .java file and adapter jar
- Compile the Java file using the following command:
- Execute the application using one of the following commands:
javac -cp .;tdv.saparibasource.jar GenOAuthSettings.java
java -cp .;tdv.saparibasource.jar GenOAuthSettings "SAPAribaSource" "connection string"
This command initiates the OAuth authentication flow and generates the OAuth settings file at the location specified in the OAuthSettingsLocation parameter. Once you deploy the adapter and authenticate, you can create a new data source for SAP Ariba Source in TDV Studio.
TDV Studio で SAP Ariba Source データソースを作成する
CData TIBCO DV Adapter for SAP Ariba Source を使用すると、SAP Ariba Source 用のデータソースを簡単に作成し、データソースをイントロスペクトしてリソースを TDV に追加できます。
データソースの作成
- データソースを追加するフォルダを右クリックし、New -> New Data Source を選択します。
- アダプター(例:SAP Ariba Source)が表示されるまでスクロールし、Next をクリックします。
- データソースに名前を付けます(例:CData SAP Ariba Source Source)。
必要な接続プロパティを入力します。
それでは、SAP Ariba Source に接続していきましょう。接続するには、以下のプロパティを設定します。
- API:CData 製品にSAP Ariba データを取得させたいAPI を指定してください。ビジネスロールに基づき、Supplier、Sourcing Project Management、またはContract API を選択します(可能な値は、SupplierDataAPIWithPaginationV4、SourcingProjectManagementAPIV2、または ContractAPIV1 です)
- DataCenter:アカウントのデータがホストされているデータセンター
- Realm:アクセスしたいサイト名
- Environment:テスト環境、または本番環境のいずれかを指定してください。(可能な値は、TEST またはPRODUCTION)
Supplier Data API またはContract API に接続する場合は、さらに以下のプロパティも設定してください。
- User:API 呼び出しを行うユーザーのId
- PasswordAdapter:認証するUser に関連付けられたパスワード
Supplier API に接続している場合は、ProjectId をデータを取得したいソーシングプロジェクトのId に設定してください。
OAuth 認証
続いて、接続プロパティを設定した後、認証のためにOAuth 接続を設定する必要があります。
- AuthScheme をOAuthClient に設定します
- サービスにアプリケーションを登録し、APIKey、OAuthClientId、およびOAuthClientSecret を取得する必要があります
OAuth アプリケーションの作成について、詳しくはヘルプドキュメントをご確認ください。
OAuth の自動リフレッシュ
以下のプロパティを設定して、接続してみましょう。
- APIKey:アプリケーション設定のApplication key
- OAuthClientId:アプリケーション設定のOAuth Client Id
- OAuthClientSecret:アプリケーション設定のOAuth Secret
接続すると、CData 製品が自動でOAuth プロセスを完了します。
- CData 製品がSAP Ariba からアクセストークンを取得し、それを使ってデータをリクエストします
- CData 製品がアクセストークンの期限が切れると自動的にリフレッシュします
- OAuth 値はOAuthSettingsLocation で指定された場所に基づいてメモリに保存されます
NOTE:DV Adapter の OAuthSettingsLocation プロパティには、OAuth 認証(上記参照)を実行したときと同じ値を設定してください。
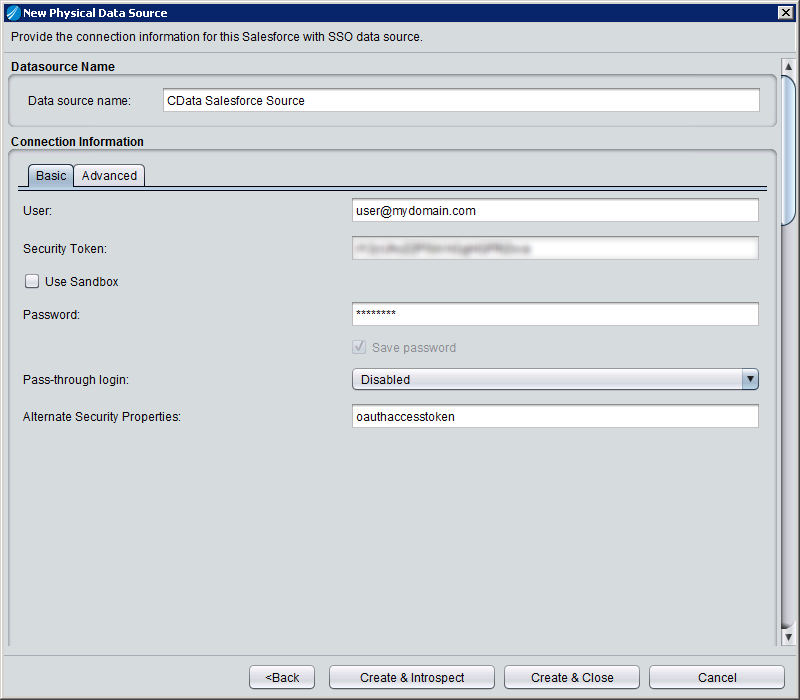
- Create & Close をクリックします。
データソースのイントロスペクト
データソースを作成したら、右クリックして Open を選択することでデータソースをイントロスペクトできます。ダッシュボードで Add/Remove Resources をクリックし、データソースの一部として含めるテーブル、ビュー、ストアドプロシージャを選択します。Next をクリックし、Finish をクリックして、選択した SAP Ariba Source のテーブル、ビュー、ストアドプロシージャをリソースとして追加します。
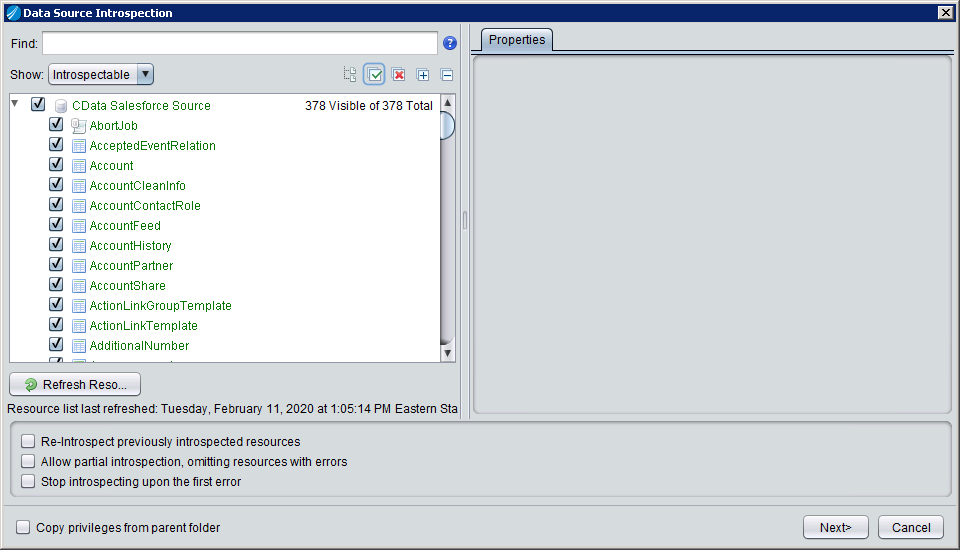
After creating and introspecting the data source, you are ready to work with SAP Ariba Source のデータ in TIBCO Data Virtualization just like you would any other relational data source. You can create views, query using SQL, publish the data source, and more.
データソースを作成してイントロスペクトしたら、他のリレーショナルデータソースと同様に TIBCO Data Virtualization でSAP Ariba Source のデータを操作できるようになります。ビューの作成、SQL によるクエリ、データソースの公開など、さまざまな操作が可能です。